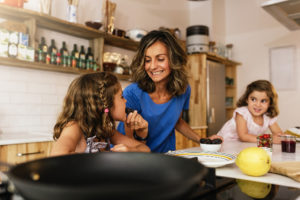
Pancakes are a breakfast staple in many homes. Want to jazz up your breakfast table? We’ve got a great suggestion – make pancake art! What is pancake art? It’s the art of making your pancakes something special, and it’s not as hard as it may seem. Here is a step-by-step tutorial on how to make amazing pancakes that your kids will love. Thanks to our friends at Instructables Cooking, here’s everything you need to know to make pancake art an easy way for your next family breakfast. If you’re short on inspiration for the shape of your artful pancakes, do a Google search for something simple like pieces of fruit, a house, a tree, a bicycle, etc. Adding the word “illustration” can help you find simplified drawings you can print out to follow as you recreate the shape using pancake batter in different colors.
- Make a list of the supplies you’ll need, and gather them:
- pancake mix
- eggs
- milk
- vegetable oil
- gel food coloring
- drawing or illustration to follow
- list of colors needed
- one large / one medium mixing bowls
- 6-8 small mixing bowls
- metal whisk
- measuring cups
- variety of sizes of squeeze bottles, some with thinner metal tips
- stovetop pancake griddle
- large, thin silicone spatula
- masking tape
- sharpie or pen
- Mix up a double batch of pancake batter but add an extra quarter cup of milk or water to make it a little runnier than normal. This helps the batter flow through the narrow end of the finely tipped squeeze bottles you’ll be using for your easy pancake art.
- Make labels for all the bottles you’ll be using to create your pancake art with masking tape and sharpie pen, so there’s no question which color is in which bottle. Tip: Use larger bottles with larger holes for the colors you’ll use to fill in larger areas, saving the smaller bottles with finer tips for outlines, small details, and colors you’ll use less.
- Use a small mixing bowl for your first batch of pancake art easy colored batter. Use enough gel food coloring to make it vibrant (kids love bright colors!) and repeat using the other small bowls until all your colors are mixed. Use a funnel to fill your labeled bottles with the appropriate color of batter.
- Turn the burners on ‘LOW’ to heat up the pan or griddle you’ll be using. Coat the surface of the pan with a little oil to make it easier to flip your pancake art and ensure it won’t stick to the pan.
- Carefully outline each area before filling it in. This helps construct a small “retaining wall” to keep the colored batter where you want it.
- As you fill each section, make sure all sections are touching to help form one solid pancake that holds together when you flip it.
- Once all sections of your pancake art easy are bubbling on the surface, gently insert your spatula around the edges to ensure your pancake is ready to flip. If it moves easily with just a slight nudge from you, it’s ready. Flip it over and behold your pancake art!

You can create just about anything with pancakes, food coloring and a little imagination. Get your children or grandchildren involved and make it a tradition, following different themes such as summertime fun, back to school, Halloween, Thanksgiving, Christmas, winter wonderland, spring flowers, and so on. Don’t think you have to stick to breakfast for your pancake extravaganza, either. Pancakes make a great lunch, brunch, and snack time treats – you can even have them for dinner if you like.
When you don’t have time to make pancake art and you’re in the Denver area hungry for a delicious meal that tastes like home, head on over to one of our two convenient Original Pancake House locations in the Denver area. You can find us at Cherry Hills or Denver Tech Center any day of the week from 6:00 am to 2:00 pm. We look forward to welcoming you soon!
